

Pair and use a Scout device
This is the click-path for Scouts — Routario’s window into the physical world. Three things, in order: pair a device, try it from its monitor page, then use it inside a flow.
Pair a device
Section titled “Pair a device”- Install the Scout app on the phone or tablet you want to pair.
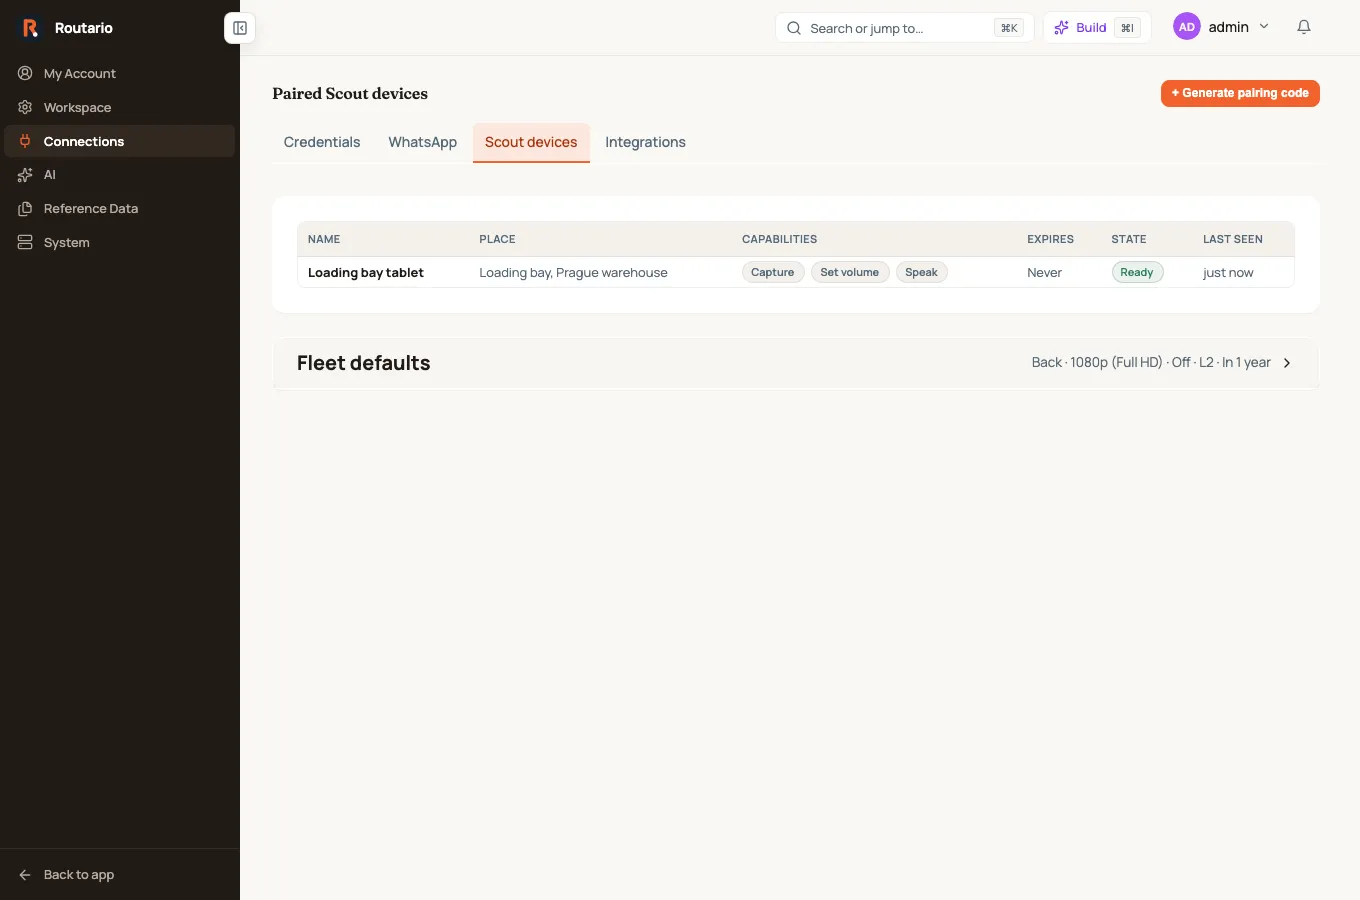
- In Routario, go to Settings → Scouts and click + Generate pairing code.
- Fill in:
- Name — how this device shows up everywhere else (e.g. “Reception tablet”).
- Placement and Place (both optional) — a free-text note and/or a real location, so the device’s captures can be tied to where they were taken.
- Level — what kind of physical agent this is (Fixed / Interactive / Mobile / Manipulating / Humanoid, or Custom). Picking a level pre-selects sensible capabilities and hides the ones that level can’t do; Custom shows every option.
- Capabilities — exactly what this device may be told to do (speak, capture, listen, set volume, and a few reserved for future device types). Only what you check here can ever reach the device — as flow steps, agent tools, or the monitor page’s act buttons.
- Token expiry — how long the device’s credential is valid before it needs re-pairing or an extension (30/60/90 days, 1 year — the default — or never).
- Click Generate code. You’ll get a QR code and a short, human-typeable code (like
WDJB-MJHT) — good for 10 minutes and usable once. - On the device, open the Scout app and scan the QR (or type the code in by hand). That’s it — the device is paired and appears in your device list.
A pairing code is single-use — if you need to pair a second device, generate a new one. You can revoke a pending code before it’s scanned, and revoke or emergency-extend an already-paired device’s token from the same page.
Try it from the device’s monitor page
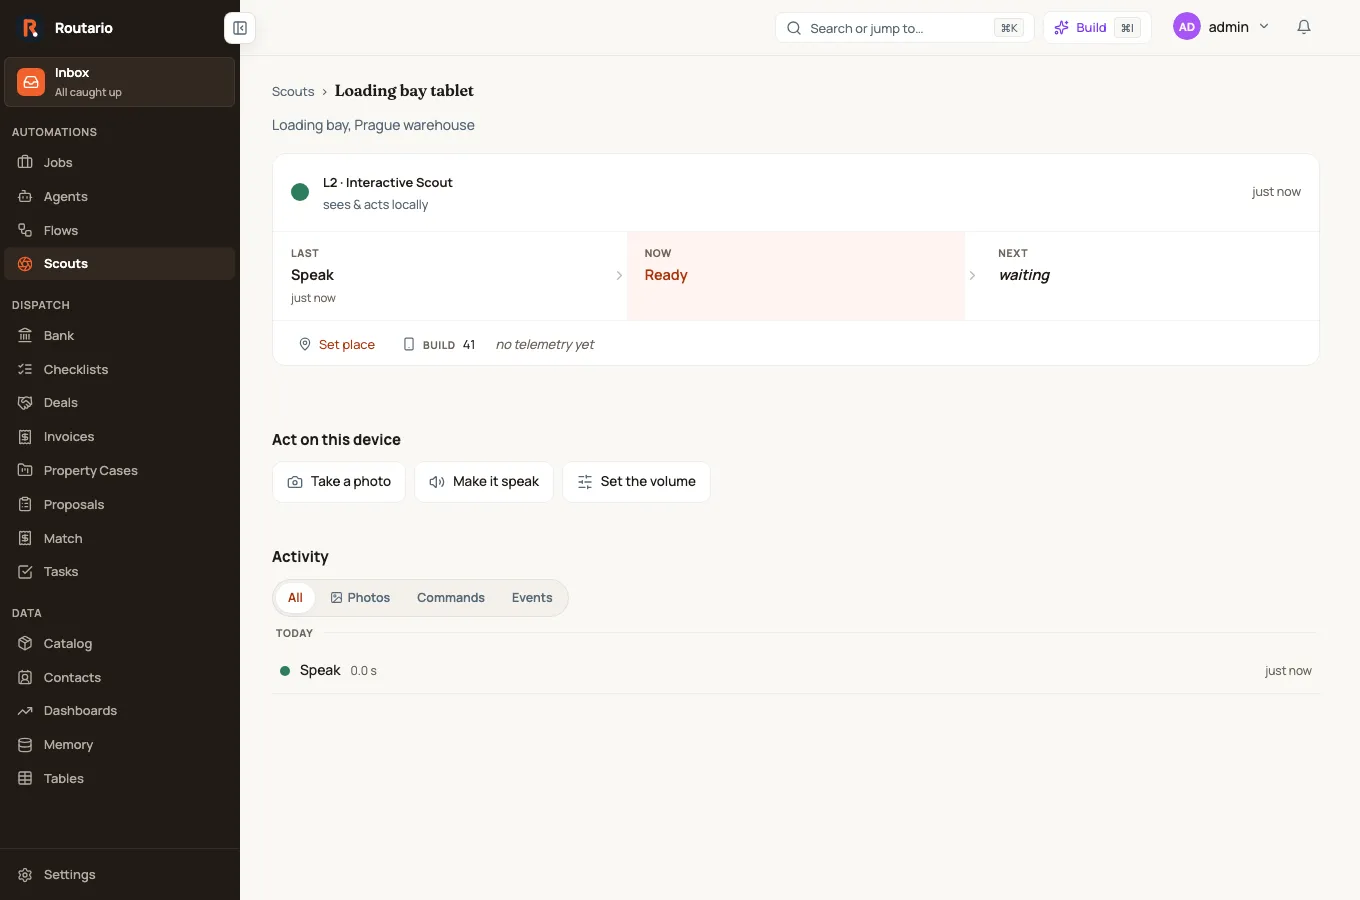
Section titled “Try it from the device’s monitor page”Open Scouts in the sidebar (under Automations) and click into a device to reach its monitor page. This is where you see what a device is doing live, and — separately from any flow — act on it directly:
- The top card shows its current state (a breathing dot that mirrors the device’s own status light), its level, and a Last → Now → Next line: what it just did, what it’s doing, and what’s queued next. Below that, whatever telemetry the device reports — battery, thermal state, network, and its last known position.
- Act on this device shows one button per capability the device is granted:
- Take a photo — optionally note why (shown on the device and stored with the photo), and open Camera options for camera (back/front), resolution, flash, and zoom — a plain multiplier (1.0 = no zoom, 2.0 = 2× in, values under 1.0 need an ultrawide lens), adjustable in 0.1 steps. The device always clamps the request to what its lens actually supports and reports back what it applied, so an out-of-range value never fails the shot.
- Make it speak — type what to say and pick a language (Auto-detect, Czech, or English).
- Record sound — pick a duration (5 seconds up to 2 minutes) and optionally note why, then capture a short audio clip. It’s a one-way, fixed-length recording — not a conversation — good for a quick mic check or grabbing ambient sound.
- Set the volume — a slider from mute to maximum.
- Activity below is the device’s timeline — everything it was told to do, did, and produced, filterable to Photos / Commands / Events. Each captured photo or audio clip can be kept in Memory individually if it turns out to be worth more than a passing check; a recorded clip shows as a waveform you can click to play from any point, so you can eyeball whether there’s actual signal before listening.
If the device is offline, an action still gets queued — you’ll just be told it may not be picked up.
Use a Scout inside a flow
Section titled “Use a Scout inside a flow”Inside a flow, a Scout capability is a step like any other — but because a device isn’t always reachable the moment you ask, capturing a photo or recording audio doesn’t hand you the result directly. It enqueues the command and moves on; the result arrives later as an event. This is the one pattern worth internalising:
Scout Capture → Wait (event: scout.observed) → steps that use the photoA worked example — check the loading bay and flag anything unusual:
- Scout Capture —
reason: "Loading bay check", leavedevice_idblank to auto-select the first device with the capture capability (or set it explicitly if you have several). - Wait —
event: scout.observed. The run pauses here until the device’s photo has actually landed. - Downstream, reference
{{ wait_event_payload.memory_item_id }}— the photo, already OCR’d and tagged like any Memory upload — and branch or act on it however the flow needs.
Scout Listen works the same way for a short audio clip — it’s also a read, so it enqueues, and you Wait on the same scout.observed event.
Scout Speak and Scout Set Volume don’t need a Wait step, since there’s nothing to read back — the step completes once the command is queued. Add a Wait on scout.spoken or scout.command_resulted only if you specifically need the flow to pause until the device confirms it acted.
A few defaults worth knowing when you configure these steps:
- Auto-select vs. explicit device — every Scout step accepts an optional
device_id. Leave it blank to auto-pick the first paired device with the right capability; set it (e.g. from{{ device.device_id }}looked up earlier) when more than one device is paired. - Retention — a captured photo or clip is temporary by default (auto-deleted after a few days) unless the step is set to
keep: memory, which files it as a permanent record right away. See Scouts: eyes, ears, and a voice in the world. - A bad zoom value never fails the step — an empty, non-numeric, or wildly out-of-range
zoom_ratio(say, from a broken template) silently falls back to no zoom rather than erroring the flow.
Where to go next
Section titled “Where to go next”- Scouts: eyes, ears, and a voice in the world — the mental model behind pairing, capabilities, and the enqueue-then-wait pattern.
- Scout Capture · Scout Listen · Scout Speak · Scout Set Volume — full field reference for every input and output.
- Wait — the step every Scout read pairs with.
- Give a teammate or agent the right access — granting people access to the Scouts area, distinct from what a device itself is allowed to do.