

Connect your bank accounts (Fio)
Routario can read your bank transactions. Once an account is connected, a payment landing in it is something your automations can act on: mark an invoice paid, stop the reminder emails, tell the right person in Slack, or just answer “did that customer pay yet?” without anyone opening internet banking.
This is read-only. Routario fetches statements. It cannot move money, create a payment, or change anything at your bank — and the token you paste is the kind Fio issues for reading only.
Before you start: declare the account first
Section titled “Before you start: declare the account first”The order matters here. You declare a bank account in Routario first, then attach a bank login to it — not the other way round.
That’s because a Fio API token is tied to one account. If you invoice in CZK and EUR, you have two Fio accounts and therefore two tokens. Routario needs to know which of your accounts each token is for, and the only way it can know is if you’ve told it what your accounts are.
Go to Settings → Company → Bank accounts and add each one — currency, account
number, IBAN, SWIFT, and a label you’ll recognise like Fio CZK. These are the
same accounts that print on your invoices, so you may well have them already.
Get a token from Fio
Section titled “Get a token from Fio”In Fio internet banking: Settings → API, and create a token for the account. A read-only token is enough — don’t grant more than that.
Do this once per account. A token created against your CZK account only ever returns the CZK statement; it can’t see the EUR one.
Connect it
Section titled “Connect it”Go to Settings → Connections → Apps, open the Invoicing & Payments section, and choose Fio Bank.
You’ll see two fields:
- Which account is this token for? — a list of the accounts you declared. Only accounts that don’t already have a token appear here.
- API token — paste it. It’s stored encrypted and never shown again.
Press Connect. Routario immediately fetches the last few days of transactions, which does two things: it proves the token works, and it reads back which account the statement actually belongs to.
Worked example: CZK and EUR
Section titled “Worked example: CZK and EUR”Say you’ve declared Fio CZK and Fio EUR.
- Create a token in Fio for the CZK account. Connect it, picking Fio CZK. The page now shows one connected account.
- Create a second token for the EUR account. Connect it, picking Fio EUR. Now it shows 2 accounts connected, each with its own status and last-sync time, and its own Test connection and Disconnect buttons.
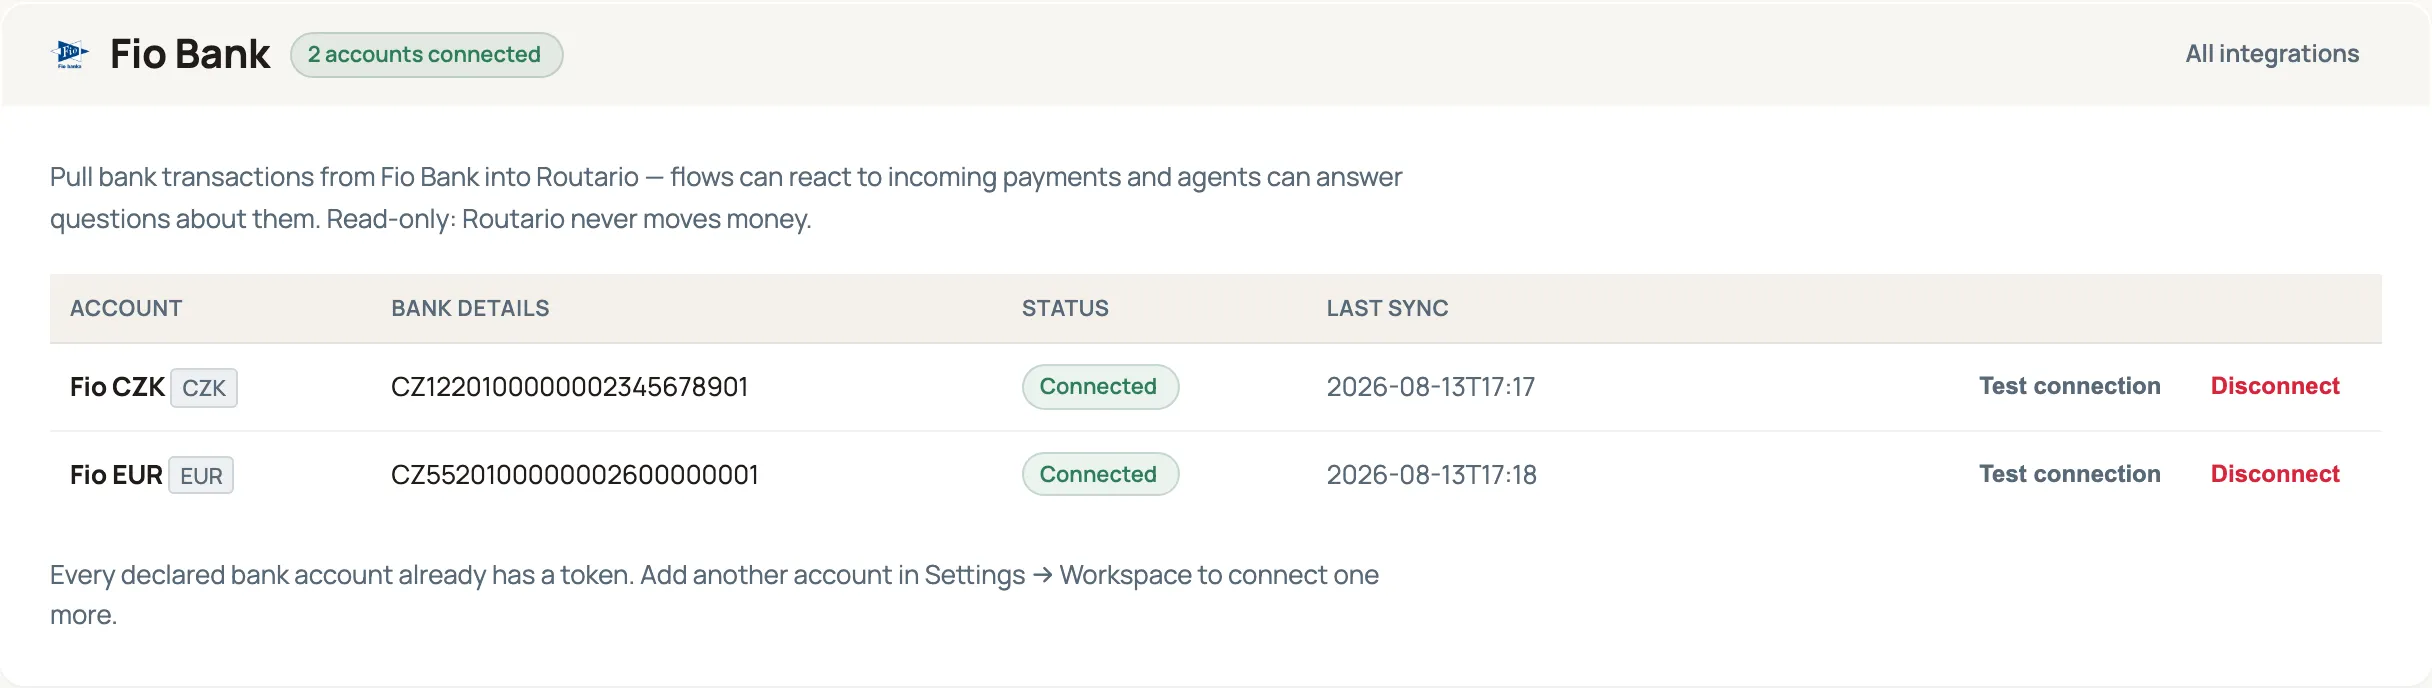
Neither token disturbs the other. They’re separate connections that happen to be at the same bank.
What happens if you pick the wrong account
Section titled “What happens if you pick the wrong account”This is the part worth knowing about, because it’s the mistake that’s easy to make and used to be expensive.
If you paste the EUR token but pick Fio CZK in the dropdown, Routario refuses:
That token belongs to a different account, so nothing was changed
Nothing is stored. Your working CZK connection is untouched, and the message names the account the token actually belongs to so you can see what happened.
Routario checks in order of strength — IBAN first, then the account number, then the currency. If you declared an account with none of those filled in, there’s nothing to compare against and the token is accepted as-is, so it’s worth filling in at least the IBAN.
Check which accounts are actually live
Section titled “Check which accounts are actually live”Back on Settings → Company → Bank accounts, each account now shows a Feed column:
| What you see | What it means |
|---|---|
| Fio | Connected and syncing. Click it to open the connection. |
| Fio — needs attention | The connection exists but the last check failed. Open it and press Test connection to see why. |
| Connect a bank | No token yet — this account is declared but nothing is reading it. |
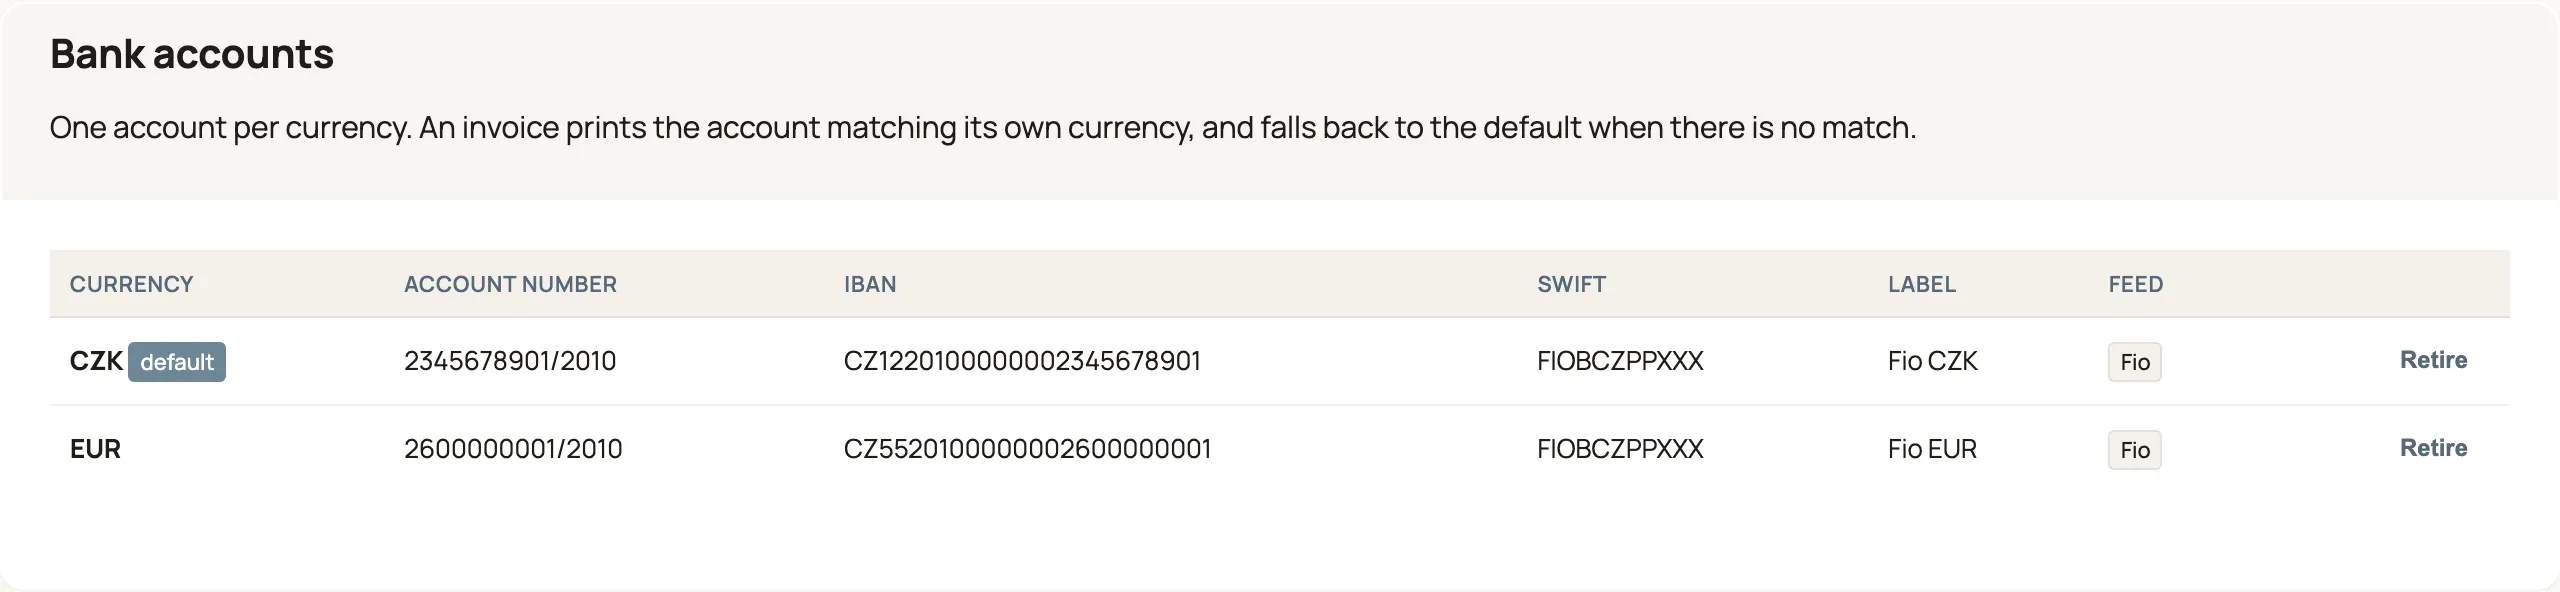
This is the answer to “I think I connected Fio, but is this account actually being read?” — one glance instead of opening each connection in turn.
Testing, waiting, and disconnecting
Section titled “Testing, waiting, and disconnecting”Test connection re-runs the same read-only fetch and reports how many transactions it saw.
Fio allows one API request per 30 seconds, per token. If a sync has just run, a test can come back asking you to wait — that’s the bank’s limit, not a fault. Each connected account has its own clock, so testing your EUR account is never blocked by something your CZK account just did.
If Fio itself turns a request away as too soon, Routario says so in those words and waits at least as long as Fio asks before trying again. A wait is never a verdict on your token — neither is Fio being unreachable. In both cases nothing is changed and nothing is stored, so the fix is to try again shortly, not to issue a new token.
Disconnect clears that account’s stored token and stops the syncing. Already-synced transactions are kept — you’re removing the connection, not the history. The other accounts carry on.
Building on it
Section titled “Building on it”Once transactions are flowing in, they’re available to your automations and to agents answering questions about payments.
Where to go next
Section titled “Where to go next”- Reconcile expenses against your bank — pair the transactions you just connected against your receipts and invoices.
- Chase unpaid invoices automatically — the natural companion: know what’s owed, and now know what’s been paid.
- Issue invoices (Fakturoid / iDoklad) — the accounts you declared here are the ones your invoices print.
- See what happened — the Logs page — where connecting and disconnecting a bank feed is recorded.